How Do You Put Apple Music on iPod Nano?
Instead of bringing the iPhone everywhere, when people are doing some outdoor activities, such as running, jogging, or hurrying to the companies, they would prefer use another portable devices such as iPod to play music for relaxing. However, iPod Touch is the only iPod model supporting to use Apple Music for streaming and downloading songs. If you are using elder models such as iPod Nano/Shuffle/Classic, you may wonder if there have ways to put Apple Music for listening offline. Today, this article will correctly show you the way to put Apple Music to iPod Nano/Shuffle/Classic with only very easy steps.
People Also Read:
• The Ultimate Guide to Play M4P Song on iPod Successfully• iPod shuffle Won't Sync Apple Music songs? Problem Solved!
Part 1. Why Apple Music Cannot be Copied to iPod Nano/Shuffle/Classic?
Unlike iPod Touch, which allows people to install Apple Music for enjoying the streaming content directly, iPod Nano, iPod Shuffle, and iPod Classic fails to support the same services. Because these iPod models are lacking in the Wi-Fi capabilities, so that Apple Music could not track whether users have activated Apple Music membership on these iPod models or not. Apple is afraid of the result that people would sync the membership service to these old iPod models, then they download the songs and directly cancel the membership permanently but keeping the songs offline. Therefore, Apple decides to avoid letting Apple Music also be synced or compatible with these iPod models, making the users of iPod Nano, iPod Shuffle, and iPod Classic fail to enjoy the same Apple Music streaming service as iPod Touch users do.
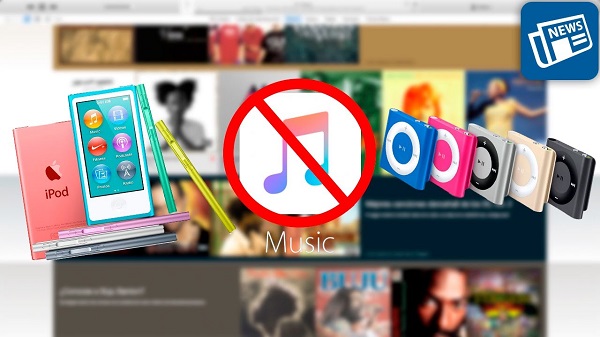
Now let’s be clear: iPod nano or shuffle is unable to sync songs from Apple Music. But with Apple Music Converter, you are able to make it happen. The secret of Apple Music Converter lies in its ability to unlock DRM protection from Apple Music M4P, and convert Apple Music to DRM-free audio formats like MP3, AC3, FLAC, AIFF, etc. If you want to remove such limitations by converting the Apple Music to common digital files such as MP3 audio files for enjoying the songs on iPod Nano/Shuffle/Classic, you need a way to remove the DRM protection added on the songs. But how? The question will be answered in the following part.
Part 2. How to Put Apple Music on iPod Nano/Shuffle/Classic
If you want to put Apple Music on iPod Nano/Shuffle/Classic for offline playback without the limitations set by Apple, you need to go through two steps. Firstly, you should remove the DRM protection from Apple Music; secondly, transfer them to the iPod devices.
Remove DRM of Apple Music Songs and Convert to MP3
To remove DRM from Apple Music, you need the help of a DRM removal software. Apple Music Converter is a helpful tool for you. It can help both Windows and Mac users to easily get the Apple Music converted to common digital audio files in MP3, M4A, AAC, AC3, AIFF, or AU format without DRM protection, then the songs can be directly transferred to the iPod old models such as iPod Nano/Shuffle/Classic for playback offline. With a very simple UI, Apple Music Converter will be easy-to-use, and everyone can easily use it to remove Apple Music DRM.
Key Features:
• Provides popular formats and original quality to convert Apple Music
• Supports to remove DRM from iTunes songs and Audible books as well
• Offers up to 10X faster speed to convert the items
• Keeps original ID3 tags and metadata information for convenient music management
Steps to Convert Apple Music to MP3
Step 1. Launch Apple Music Converter
When you have installed Apple Music Converter, run it on computer and wait for iTunes to be opened automatically as well. After that, you will see the iTunes Library will directly be loaded in Apple Music Converter.
Step 2. Select Apple Music Songs
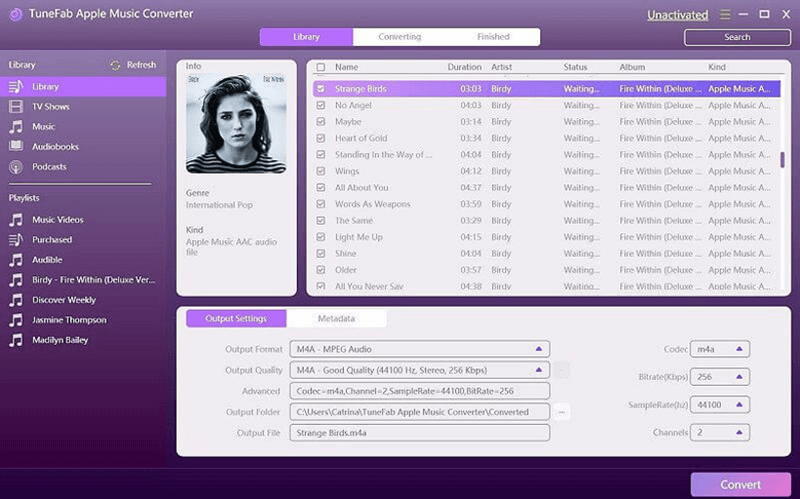
Now go to “Library”, and you can directly select the Apple Music songs you need to convert to MP3 and remove the DRM protection. You can select a list of songs at once.
Step 3. Choose MP3 As the Output Format
Now you can go to “Output Settings” and select MP3 as the output format. It also provides M4A, AAC, AC3, AIFF, and AU formats for you to choose.
Here, people can also change the “Codec”, “Bitrate”, “SampleRate”, and “Channels” for the converted songs.
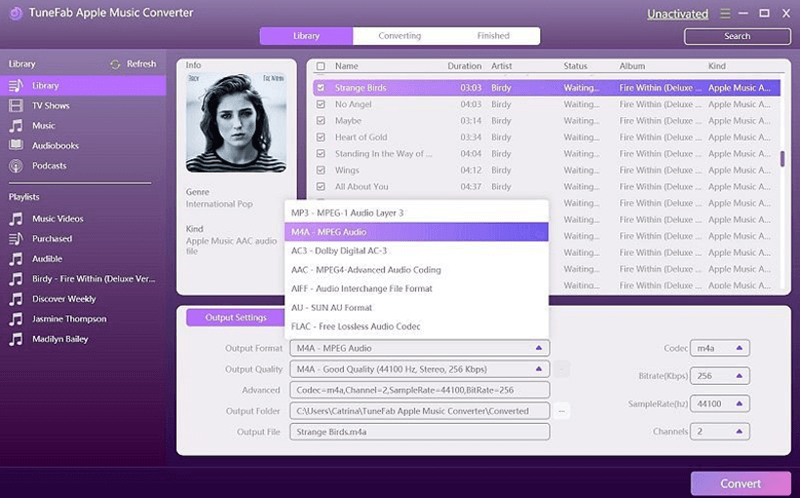
Step 4. Convert Apple Music to DRM-free MP3
Finally, you just need to click the “Convert” button, and the selected Apple Music will directly be converted to MP3. During this process, the DRM can be removed from the songs as well.
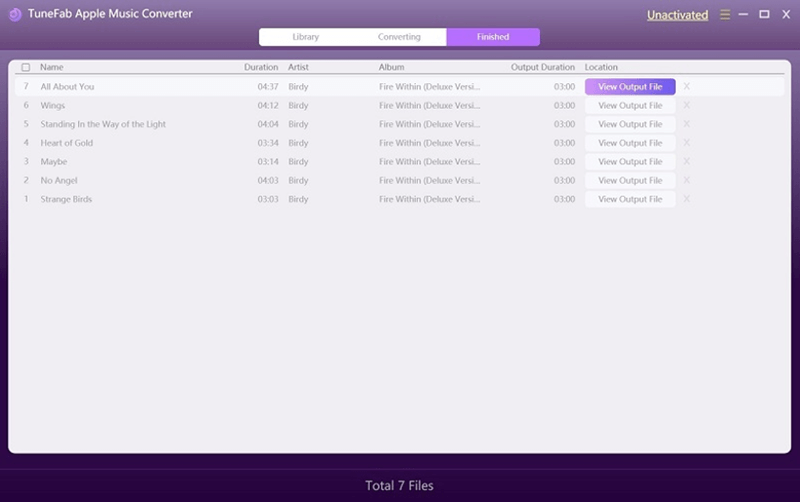
When all the songs are converted to MP3, you can go to the output folder directly by clicking the “View Output File” in “Finished” section. After accessing the DRM-free MP3 Apple Music, you need to follow the next steps to put them to iPod Nano/Shuffle/Classic for offline playback.
Transfer Converted Apple Music to iPod Nano/Shuffle/Classic
There are two ways for you to put the DRM-free Apple Music to iPod Nano/Shuffle/Classic – use iTunes to sync or transfer with a USB cable.
1. Transfer Apple Music to iPod Nano/Shuffle/Classic Using iTunes
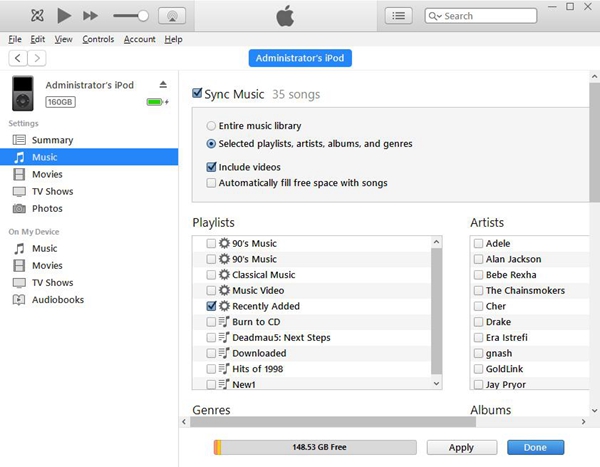
Step 1. Firstly, create a new playlist in iTunes Library and then import the converted DRM-free Apple Music to it.
Step 2. Connect your iPod Nano/Shuffle/Classic to the iTunes.
Step 3. Click the “Apply” option and iTunes will directly sync the added converted songs to the iPod automatically.
2. Transfer Apple Music to iPod Nano/Shuffle/Classic Using USB Cable
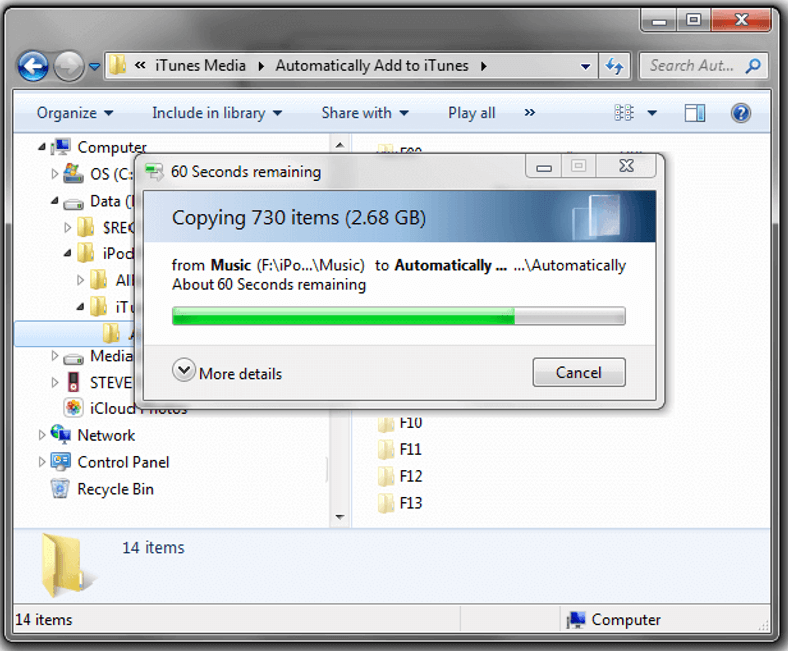
Step 1. You need to connect your iPod Nano/Shuffle/Classic to the computer using a USB cable.
Step 2. On your computer, go to “My Computer” folder and then find the “iPod” folder for entering it.
Step 3. Now, simply copy and paste the folder of the converted Apple Music to “iPod” folder for putting the songs to the iPod device.
Part 3. Record Apple Music to MP3 for Your iPod Nano/Shuffle/Classic
Except for using an Apple Music Converter, another easy way to save Apple Music to DRM-free MP3 files for putting them to iPod Nano/Shuffle/Classic for playback is to use a recorder to record the songs. VideoSolo Screen Recorder is such as helpful software that helps Windows and Mac users to record Apple Music on computers with high quality and easy operations. The songs can be saved in MP3 or M4A format, so that it is much easier for people to transfer the songs to iPod devices. The following steps show you how to use VideoSolo Screen Recorder to record Apple Music songs.
Step 1. Open VideoSolo Screen Recorder
After installing VideoSolo Screen Recorder on your Windows and Mac computer, open it and choose “Audio Recorder” on the homepage.

Step 2. Test and Adjust System Sound Volume
Turn on “System Sound” and adjust the volume before you start to record an Apple Music song. By turning off the microphone, you will get higher quality in recording Apple Music because no noise will be captured.

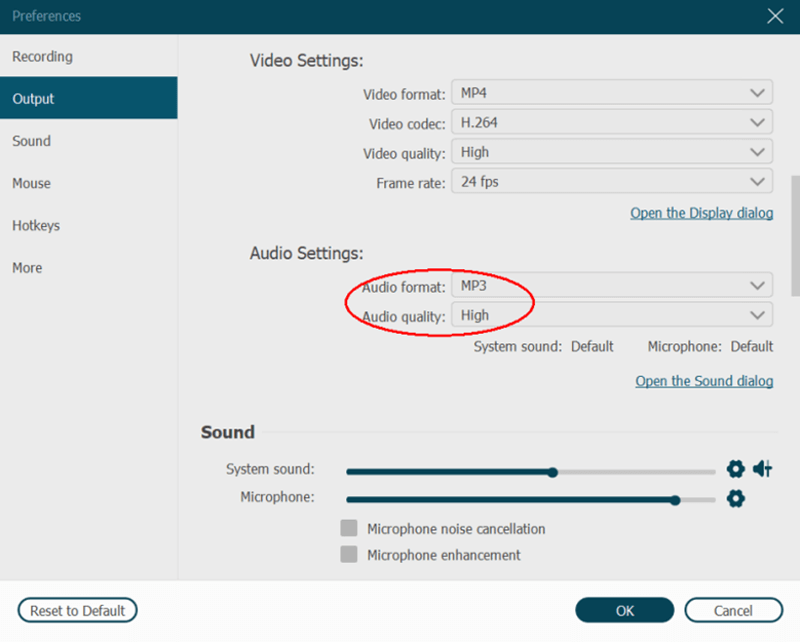
Step 3. Select Audio Format and Quality
Now you can go to “Preferences”. Then in “Output” section, you can find “Audio Settings” to select the format and quality for saving the recorded Apple Music files. Click “OK” after the settings done.
Step 4. Start Recording Apple Music
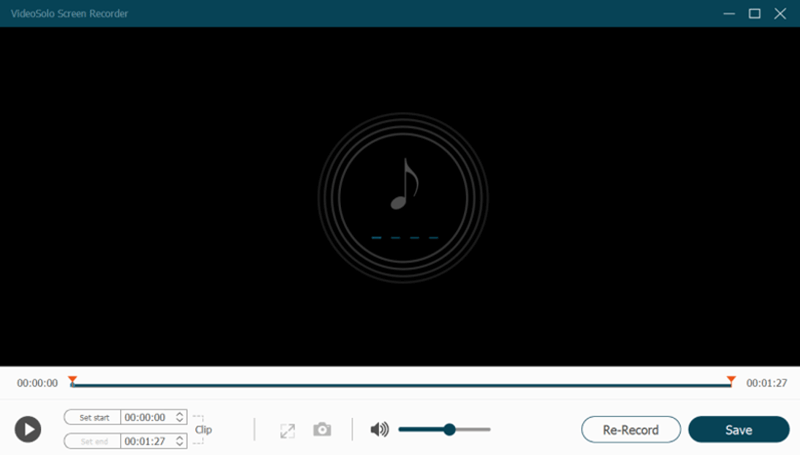
Now, just play Apple Music song and press the “REC” button to record the song. When the song ends and the recording is stopped, you will be turned to the preview window and save the recorded Apple Music to your computer.
In Conclusion
To play Apple Music on iPod Nano/Shuffle/Classic, people only need to get the DRM-free Apple Music songs at first, then transfer them to the iPod devices for enjoying even without the Apple Music app. Based on this, both using a converter and screen recorder can help. If you also get an iPod and want to play Apple Music on it, just need to choose the best way for yourself to try.
- 5 Ways to Convert Apple Music to MP3 [Latest Update]
- How to Remove DRM from Apple Music [4 Best Solutions]
- How to Convert Audible AA Files to MP3 [Simple Ways]
- M4P to MP3 – How to Batch Convert M4P to MP3
- Ultimate Ways to Convert AAX to MP3 [Fast and Safe]
- Convert M4P to M4A Tutorial [Top 4 Methods]

