If you have saved many songs in iTunes for playing with the software, you may also discover that iTunes music can only be enjoyed with iOS devices or iTunes player. So, when you want to transfer iTunes music to other devices such as an Android device or a MP3 player, it becomes hard for you. However, there are still ways provided to help convert iTunes to MP3 so that you can freely enjoy the songs at anytime and anywhere. How? This article will offer the 4 effective ways to you.
People Also Read:
• 5 Ways to Convert Apple Music to MP3 [Latest Update]• 10 Best M4P to MP3 Converter [2022 Updated List]
Part 1. What Format is iTunes Music? When Would You Need to Convert iTunes to MP3?
Some people consider that MP3 is a general name for calling all music files. However, this is not correct. MP3 is just one of so many audio formats used to save audio files. When it comes to the music sold in iTunes, the music files are in AAC format. However, some AAC iTunes Music are protected, which only allows people to play with Apple products. Even for the DRM-free iTunes Music, AAC format may not be supported by some devices or players, which is less popular than MP3.
Because of the limitation of Apple’s DRM and the less popularity of AAC format, here are some conditions when you can’t play iTunes Music and want to convert the songs from both protected and unprotected AAC format to MP3.
• Your devices or players can’t play the AAC files
• Transfer the protected iTunes Music for playback outside iTunes
• Save storage space because AAC files have larger size than MP3
• Rip the iTunes music to CDs as collections
Part 2. Best iTunes to MP3 Converter Recommended to Extract MP3 from iTunes
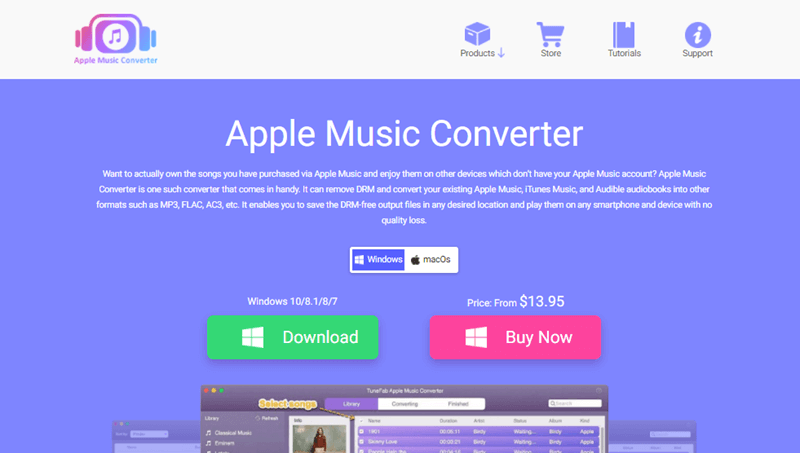
The best and quickest way to convert iTunes to MP3 is to find a reliable software to help. Apple Music Converter is good tool supporting to convert both protected and unprotected iTunes Music to MP3 files for playback offline. It provides common formats such as MP3, M4A, AAC, and so on to save the converted iTunes Music. With original quality, people can enjoy the same quality music playback after the conversion.
Except for these, Apple Music Converter can run at 10X faster speed and also saves the original ID3 tags & metadata information to download iTunes Music. For both Windows and Mac computers, the software can run fluently with the best service provided to all users.
Part 3. Best iTunes to MP3 Converter Recommended to Extract MP3 from iTunes
Apple Music Converter won’t waste your time in learning how to use because the software is designed simply. You can quickly process the iTunes Music conversion following the steps here. Get started now.
Step 1. Install Apple Music Converter and iTunes
After installing Apple Music Converter on your computer, also check whether iTunes is installed as well. You should save the iTunes Music to iTunes Library at first so that Apple Music Converter can automatically detect the list for you.
Step 2. Select iTunes Music from List
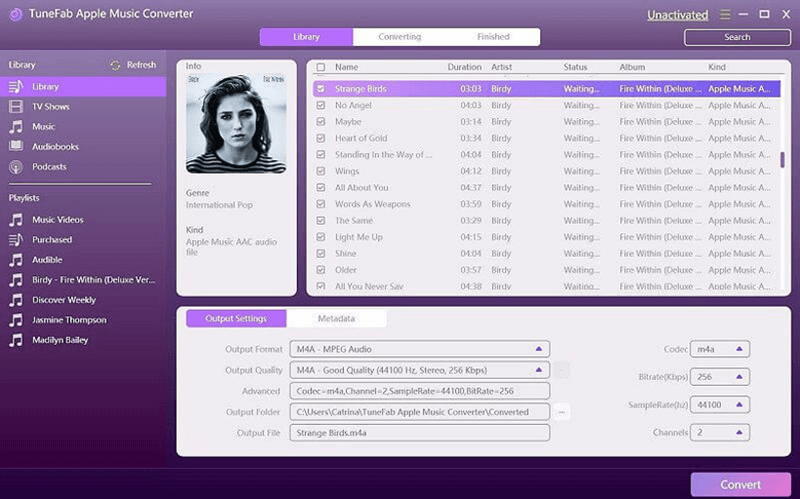
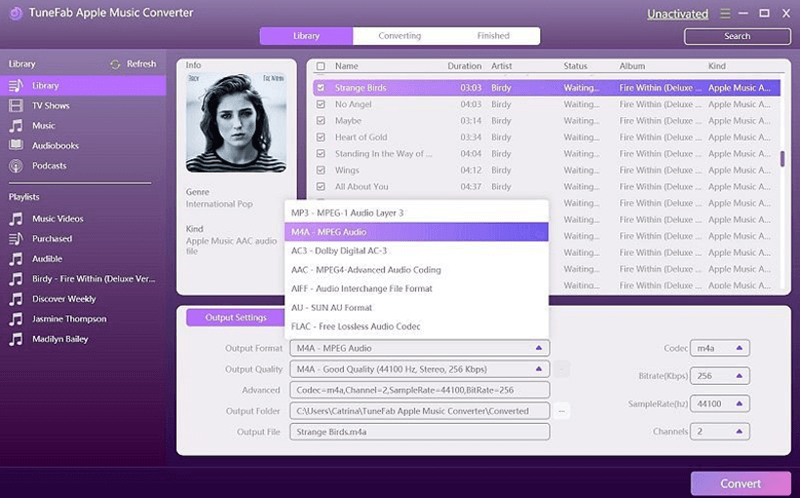
When you open Apple Music Converter, the software will connect to iTunes and the iTunes Library will directly be loaded in the converter. You can select the songs you want to remove DRM and convert to MP3 from the “Library” list.
Step 3. Choose Output Format and Edit Metadata
Now you can go to “Output Settings” and select MP3 as the output format. In “Metadata” next to “Output Settings”, people can also edit the title, artist, album, and other ID3 tags before converting iTunes Music to MP3.
Step 4. Remove iTunes Music DRM and Convert to MP3
When you have selected the output format and edited the ID3 information, start converting iTunes Music to MP3 by clicking the “Convert” button. Then just wait patiently until the conversion finished.
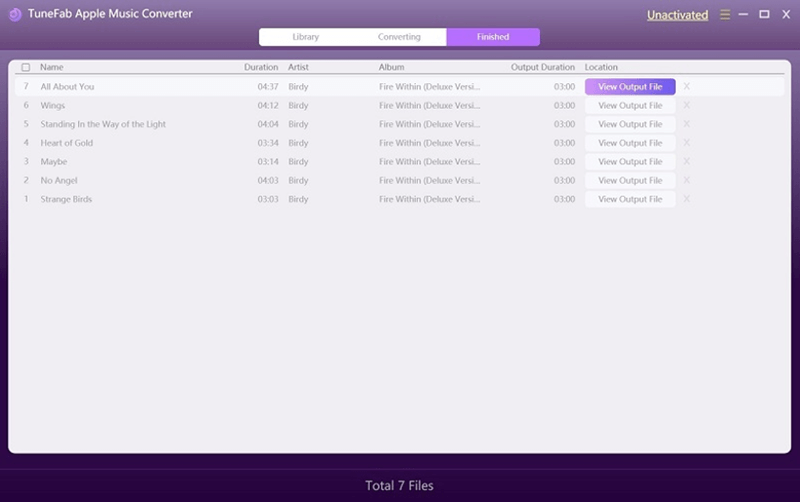
When the iTunes Music is converted to MP3, the audio files can be freely transferred to any devices for playback offline. More importantly, the files are completely DRM-free!
Part 4. How to Convert iTunes Files to MP3 Through iTunes/Apple Music
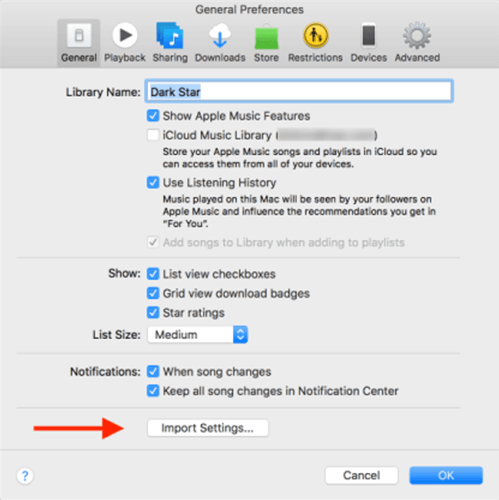
Step 1. Open iTunes on your computer, then choose “Edit” on the menu bar. In the drop-down list, select “Preferences” and then choose “General” section.
Step 2. In “General”, open “Import Settings” and select “MP3 Encoder” as the “Import Using” option. Click “OK” when the selection is finished.
Step 3. Go back to your iTunes Library and find the iTunes Music or playlist you want to create MP3 version.
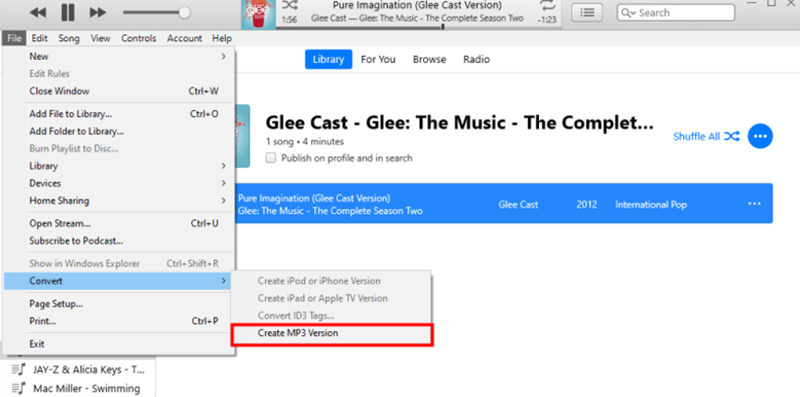
Step 4. After selecting the song or playlist, click “File” and choose “Convert”, then you will see the “Create MP3 Version” here. Choose it and the iTunes Music can be converted to MP3 inside iTunes.
Compared to Apple Music Converter
However, if you create MP3 version for the protected iTunes Music, the songs can only be played within iTunes or on the Apple products after backing up them to the devices using iTunes. But Apple Music Converter can help convert both protected iTunes Music and also the unprotected one’s to MP3 at once. It would be more convenient using it.
Part 5. Alternative Way to Record iTunes Music to MP3
It won’t be difficult if you also want to record iTunes Music to MP3. VideoSolo Screen Recorder provides a simple audio recorder that is easy to operate for people to capture iTunes Music for saving in MP3 or M4A audio files. The recorder also has the enhancement mode to make sure the recorded files can have good playback quality. As a result, if you don’t want to use a converter to convert iTunes Music to MP3, you can try VideoSolo Screen Recorder.
Steps to Record iTunes Music to MP3 with VideoSolo Screen Recorder
Step 1. Go to Audio Recorder in VideoSolo Screen Recorder
When you have installed VideoSolo Screen Recorder, open the software and choose “Audio Recorder” on its home screen.

Step 2. Adjust System Volume
In “Audio Recorder”, turn on “System Sound”, and you can adjust the volume to the level you like. It is recommended to turn off the microphone for not recording extra noise.

Step 3. Choose Audio Format as MP3
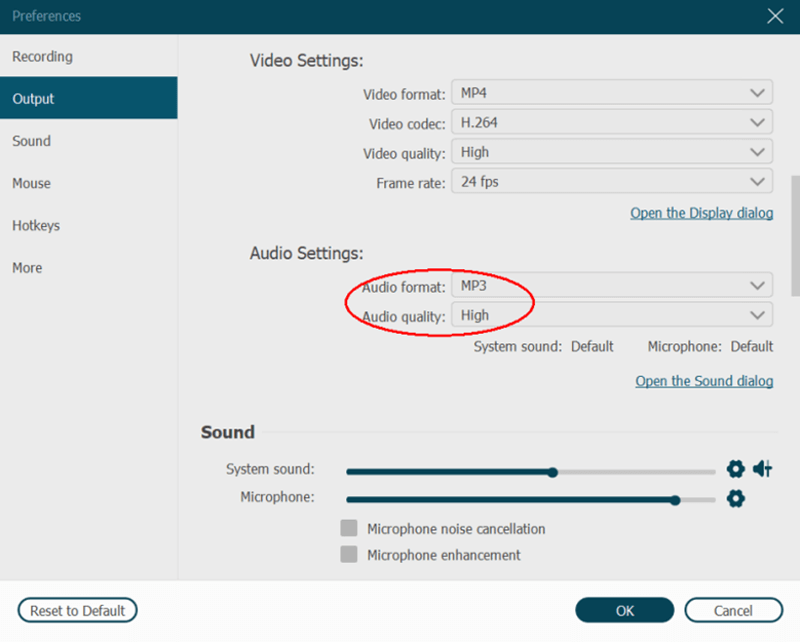
Now you can go to “Preferences” and change the “Audio Format” to MP3 for making sure the recorded iTunes Music can be saved in MP3 format. Clicking “OK” can save the change after your selection.
Step 4. Record iTunes Music
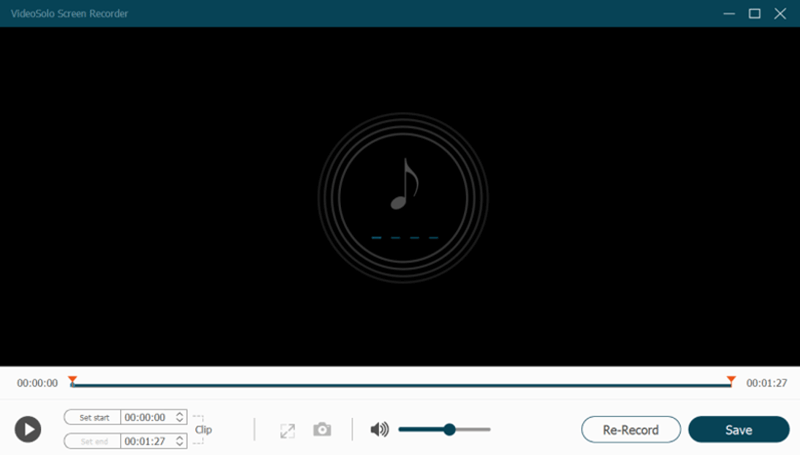
Finally, play the iTunes Music and start the recording. Just wait for the song to end playing and the recorded MP3 audio file can directly be saved to your computer.
Compared to Apple Music Converter
Using VideoSolo Screen Recorder to record iTunes Music to MP3 would be time-wasting because you have to record the songs one-by-one. By comparison, the batch conversion feature provided by Apple Music Converter can help you to convert a list of songs at once, which saves much time for you.

