How to Export Music from iTunes to Your Computer [In Detail]
Since 2009, when iTunes has released the iTunes Plus format, users have the right to download the purchased songs for streaming on any devices and music players regardless of the Apple ID authorization, because the iTunes Plus format is developed as a totally DRM-free encoder. However, except for the iTunes Plus iTunes Music, other types of iTunes Store purchases are still under the encryption of DRM. For this content, people can only play them on five authorized computers in maximum.
It takes only one shot to export iTunes Music to computers if the songs are encoded with iTunes Plus format. But what if they are not utilizing iTunes Plus encoder? Under such circumstance, you only need a hand from a reliable music converter. Please scroll down and continue reading.
People Also Read:
• Top 7 M4A to MP3 Converters Free to Turn M4A Files into MP3• How to Download Music from iTunes to Computer Effectively
Part 1. How to Export Playlist from iTunes to Local Storage (Step-by-step Guide)
No matter for the iTunes Plus encoded iTunes Music, or those purchases released before the emergence of iTunes Plus (the DRM-protected iTunes songs), Apple Music Converter can incredibly assist people to unlock the DRM encryption, and easily export iTunes playlists to local storage within a moment. Now, let me introduce this program explicitly to you.
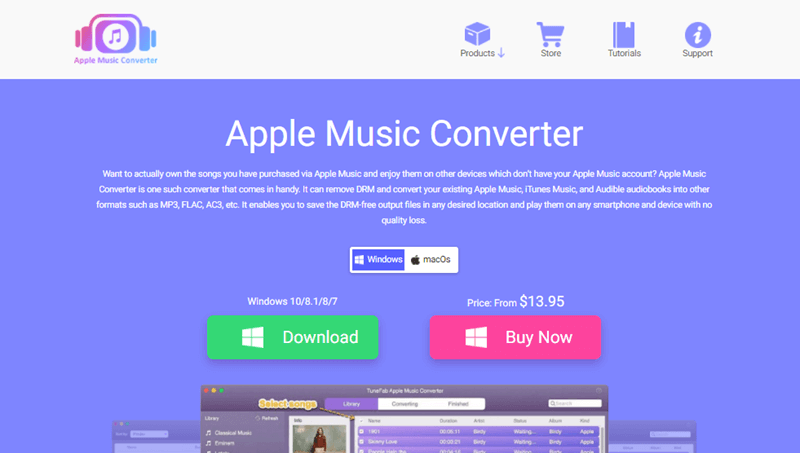
Apple Music Converter is invented with cutting-edge technologies, which can easily break the sophisticated DRM protection method, in that achieve the Apple Music, iTunes Music, and Audible books DRM removal in handy manipulation. Furthermore, the impressive features of Apple Music Converter also attribute to its high popularity and great reputation since the release. The following ones are the fundemantal criteria that drive a large number of users to select it:
- Auto synchronization with iTunes: the program can pair with iTunes to load the whole music library and import the saved media content for people to select to convert directly.
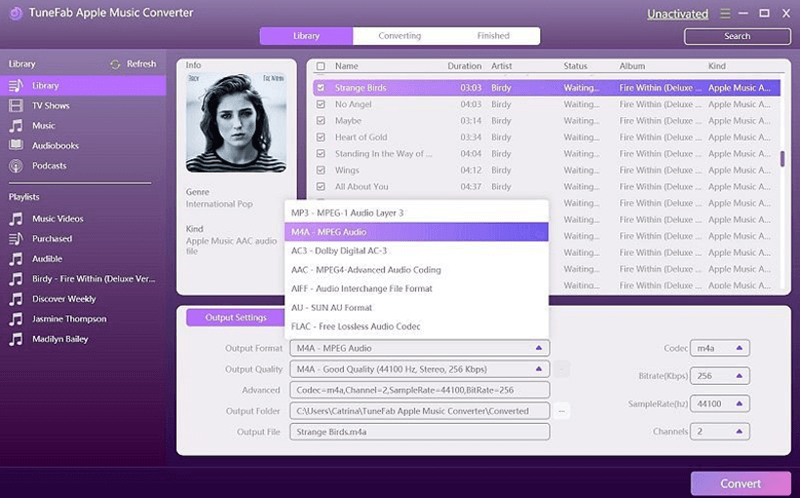
- Popular output encoders available: several popular encoders such as MP3, M4A, AAC, AC3, AIFF, and AU are available for selecting to export the iTunes library to improve higher file compatibility.
- Lossless sound quality and metadata information: from the sound quality to the song information, the program will retain fully during the conversion without any loss.
- Personalized audio parameters: it also allows people to alter the audio parameters such as Bitrate, Codec, Sample Rate and Channels freely in personal requirements.
- 10X faster speed and batch processing feature: the program also guarantees high productivity to export iTunes Music through providing the 10X faster speed plus batch conversion feature at the same time.
If you also consider Apple Music Converter a fantastic program after walking through its overview, why not freely install the software and try to manipulate it for exporting your iTunes playlist to computer in no time? Well, the following guide will lead you through the details of the program manipulation. Please check and follow to proceed.
Step 1. Synchronize Apple Music Converter with iTunes
First, please make sure both Apple Music Converter and iTunes app are well installed on your computer. Subsequently, directly launch Apple Music Converter and the program will detect iTunes for loading iTunes Library with all the saved playlists to the converter for you.
Step 2. Select iTunes Playlist and Songs to Export
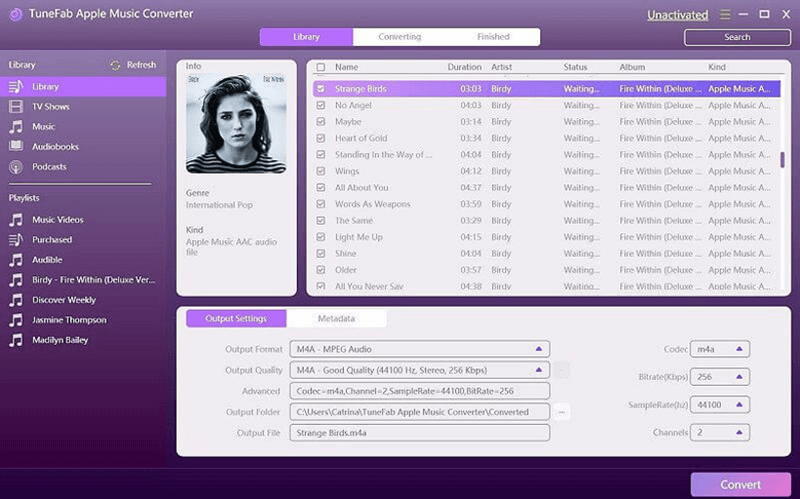
You can select an iTunes playlist from the left navigation panel, and also tick the exact songs on the right Library for preparing to export them from iTunes to your computer.
Step 3. Configure Output Format and Parameters
Subsequently, go down to Output Settings for determining an Output Format and Output Quality to export the iTunes playlist. You can further alter the audio settings such as Bitrate, Codec, Sample Rate and Channels in your own preferences for exporting the media content.
Step 4. Proceed Exporting iTunes Playlist to Computer
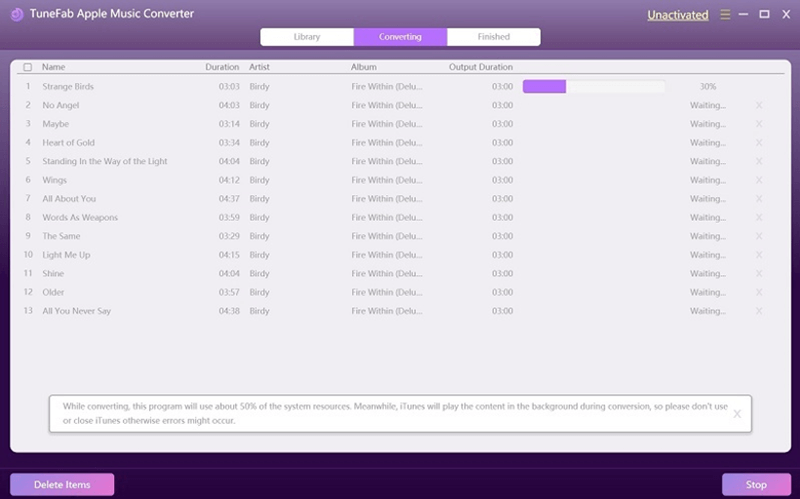
When the parameters are determined, now we come to the final step. Please directly tap on the Convert button to proceed the music export. Apple Music Converter will respond to your command and initiates to export the iTunes playlist from iTunes to local folder on your computer in no time.
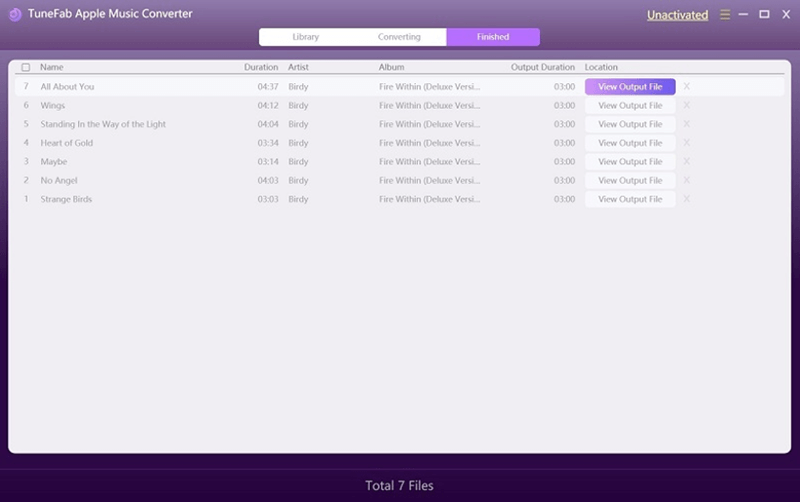
You can access the exported iTunes playlist after Apple Music Converter completes the conversion. Please switch to Finished module, and by clicking on the View Output File button, the folder will be opened, and you can discover the downloaded songs here.
Part 2. How to Export Songs from iTunes to Computer Free via iTunes
For those who acquire protected iTunes purchases that are not encoded in iTunes Plus format, Apple Music Converter is no doubt the best solution to export iTunes Library to computer. However, if all your iTunes songs are encoded in iTunes Plus, which also means that they are not encrypted by DRM, this conventional method - export songs from iTunes to computer utilizing iTunes itself, will be the best option. The following guide will walk you through how to process it. The manipulation would be quite easy as a piece of cake!
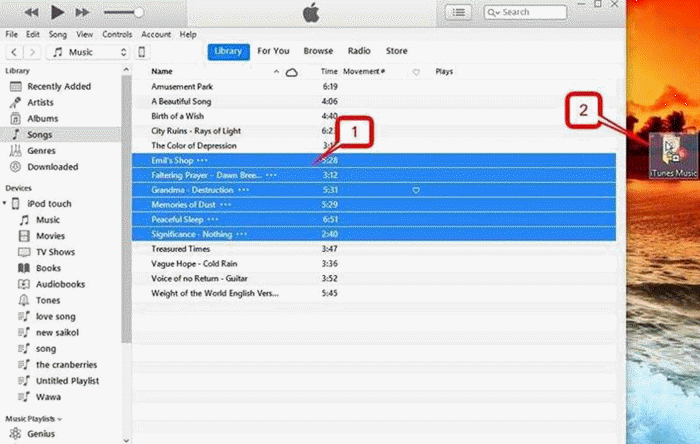
1. First, simply create a new folder on your desktop for preparing to save the exported iTunes songs.
2. Run iTunes app and sign in your Apple ID for accessing your iTunes Library. Then open the playlist which contains the songs you wish to export to computer.
3. Highlight the iTunes songs, then directly drag them to your newly created folder. Guess what? The songs are successfully exported to your computer locally!
Part 3. Extra Tips: How to Add Music from Computer to iTunes for Playing
Conversely, iTunes also permits users to import the music from computer to iTunes for streaming with iTunes player. This tip is a simple manipulation guide showing you the correct way to add music to iTunes Library. Please try.
1. Open iTunes app on your computer.
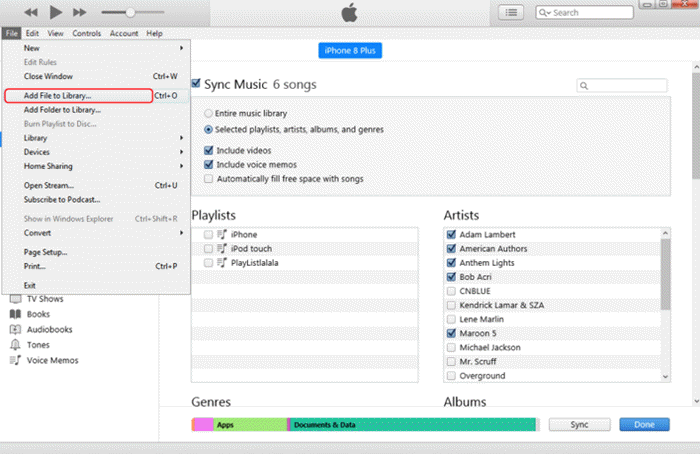
2. Go to File >> Add File to Library or Add Folder to Library.
3. Browse your computer for locating and selecting a music file or a whole folder.
4. Select the object and tap the Open button, then the music can be imported to iTunes Library for playback later.
Final Words
Till here, we successfully breakdown the music exported from iTunes to computer manipulation! To sum up, you can easily sort out the best method according to whether your iTunes Music are encrypted or not. But still, you can utilize Apple Music Converter for it is able to export the whole iTunes Library to computer at once regardless of the content is protected or not. It powerful function deserves your value. Enjoy!

