>
Tutorials
>
Convert M4P to MP3 on Mac
M4P to MP3 Converter on Mac: How Can I Convert M4P to MP3 on Mac?
LAST UPDATED: Apr. 05, 2017
If your music library is built with hundreds of thousands MP3 songs, it will be easy for you to transfer and play them on just any device you like, such as iPhone 7, iPad, iPod, Samsung Galaxy S8, etc. However, if you have a large collection of Apple Music songs which is formatted as protected M4P, it’s quite hard to transfer them to other devices (specifically non-Apple devices) for enjoying like MP3 player or burn to CD for playing in the car. So it makes sense why people are asking questions like:
• M4P to MP3 – How to Batch Convert M4P to MP3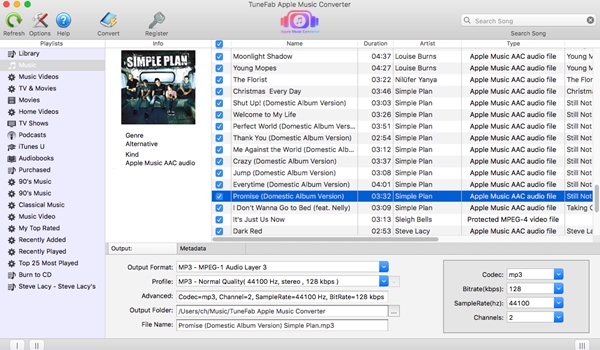
 Is this guide useful to you? Share it with your friends or family members if you like it!
- I have an iPod nano, and I’ve got everything set up before copying the M4P files from my Mac to the iPod. But when I sync the Apple Music to iPod nano, it says I cannot copy the songs to iPod!
- I'm trying to add Apple Music songs into my PPT presentation as the background music, but it seems like a huge hassle because of Apple Music’s M4P format.
People Also Read:
• 10 Best M4P to MP3 Converter [2022 Updated List]• M4P to MP3 – How to Batch Convert M4P to MP3
How to Convert M4P to MP3 on Mac (macOS Sierra)
Apple Music Converter for Mac can not only convert M4P to unprotected MP3, but also convert DRM-ed iTunes songs, audiobooks to MP3, AC3, AIFF, FLAC, etc. After removing the Apple FairPlay DRM, you can easily transfer the Apple Music to any portable device or use as background music in your video project, PPT presentation, etc. You can also use it to set Apple Music as ringtone.Step 1. Installation of Apple Music Converter for Mac
Run M4P to MP3 Converter for Mac after installation. When you see iTunes launches successfully, you are able to preview the entire iTunes library in the main interface of the program.
Step 2. Adjust Audio Conversion Speed
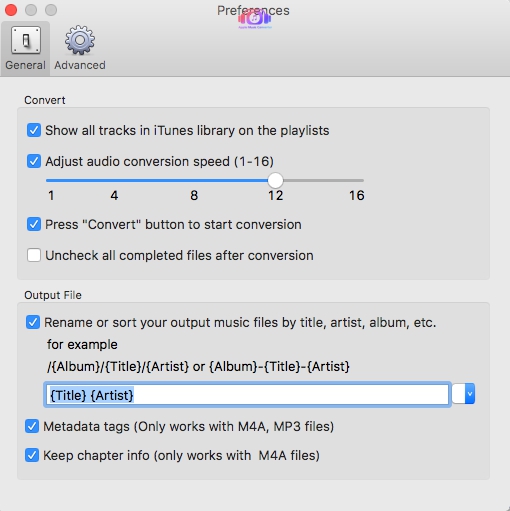
This program has a user-friendly design, that it, it allows you to set up the conversion speed for audio conversion from 1X to 16X. You can go to "Options" > "General" > "Set custom conversion speed for audio convert" to adjust the conversion speed.
Step 3. Choose MP3 as Output Format
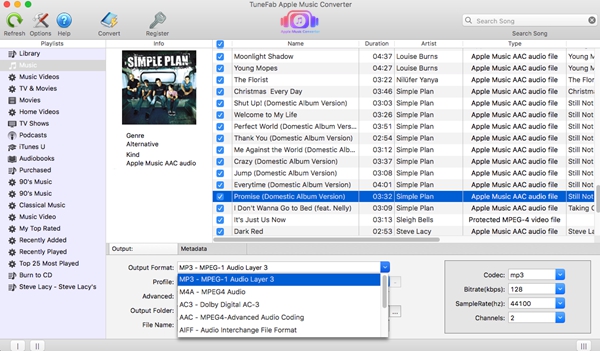
You can go to "Output" > "Output format" to select MP3 as the output format.
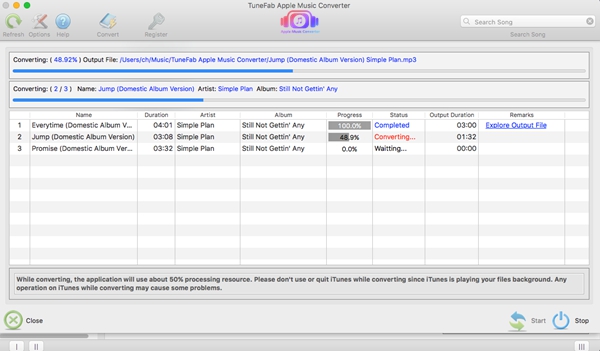
Step 4. Convert M4P to MP3 on Mac
Click on "Start Convert" button, the M4P to MP3 Converter for Mac will start the audio conversion. You can click on "Open Save File" to find the converted files. After that, you can enjoy the songs on MP3 player, car player or burn them to a CD, etc. Is this guide useful to you? Share it with your friends or family members if you like it!
Popular Articles

